


You might feel overwhelmed when dealing with heat pump issues, but addressing these problems can be straightforward. Start by understanding the basics: inspect your thermostat settings, check unrestricted airflow, and look for refrigerant leaks. You’d be surprised how often these simple checks can solve uneven temperatures or strange noises. Regular maintenance, like changing air filters and sealing ductwork, plays an essential role, too. But what happens when problems like electrical issues or frozen coils aren’t so simple? That’s where things get interesting, and there’s more to explore to guarantee your system runs efficiently.
Understanding Heat Pump Basics
To understand heat pump basics, you need to grasp how these devices efficiently transfer heat from one place to another, utilizing refrigeration cycles to heat or cool your home. A heat pump extracts heat from outside air, water, or the ground and moves it indoors. This process reverses to cool your home, expelling heat outside.
Key components include the evaporator, compressor, condenser, and expansion valve. Each plays a significant role in the refrigeration cycle, guaranteeing efficient thermal transfer.
When operating, verify the thermostat is set properly and that the unit is free from obstructions. Check the heat pump’s filters, as clogged filters restrict airflow, reducing efficiency. Listen for unusual noises, which might indicate compressor or fan motor issues. If the system isn’t heating or cooling effectively, inspect the outdoor unit for ice buildup, which can signal defrost cycle malfunctions.
Regular maintenance is essential. Clean coils to prevent debris accumulation and verify the refrigerant level is ideal. Low refrigerant can indicate leaks, requiring professional intervention. By understanding these basics, you’re better equipped to troubleshoot and maintain your heat pump, ultimately serving those who rely on your expertise to keep their environments comfortable.
Diagnosing Uneven Temperature
When diagnosing uneven temperatures, first confirm the thermostat’s settings are consistent throughout your home and verify that airflow obstructions are absent in both the intake and discharge paths. Check all the room vents to guarantee they are open and unblocked. Clogged filters can restrict airflow, so replace them if necessary. A thermometer measures the temperature in different rooms, comparing readings with the thermostat setpoint.
If variations persist, inspect your ductwork for leaks. Leaks can cause air to escape, leading to temperature discrepancies. Seal any noticeable gaps with duct tape or mastic sealant. Additionally, assess the heat pump’s refrigerant levels. Low refrigerant can impair performance, causing uneven heating or cooling. If you’re uncertain, contacting a professional for a full diagnostic is advisable.
Another potential issue could be an improperly sized heat pump. An undersized unit struggles to maintain a consistent temperature, while an oversized one cycles on and off, creating an uneven distribution. Review your heat pump’s capacity relative to your home’s size. Finally, verify that no external factors, such as open windows or doors, influence indoor temperatures. You can efficiently address and resolve uneven temperature issues by methodically examining these elements.
Fixing Strange Noises
Start by identifying the type of noise your heat pump is making. Different sounds can indicate specific issues requiring targeted solutions. If you hear rattling, inspect the fan blades or panels. They may be loose and need tightening or realignment. A grinding noise often points to a motor or bearings. Shut off your unit immediately to prevent damage, and consider professional servicing for motor replacements.
Check electrical connections and capacitors for buzzing sounds. Loose or faulty components may need securing or replacing. A squealing noise usually suggests a belt problem or lack of lubrication. Inspect the belt for wear and consult your manual for lubrication points.
If your heat pump emits a hissing sound, it might be a refrigerant leak. Confirm this by checking for frost accumulation on coils. This requires professional repair due to environmental regulations.
Lastly, popping noises often result from thermal expansion in the ductwork. While generally harmless, you can mitigate this by adding insulation around ducts. Always prioritize safety; if you’re unsure about any repair, seek professional help. Addressing these issues guarantees your heat pump operates efficiently, providing comfort to those you serve.
Addressing Low Airflow
Make sure your heat pump’s registers and vents are fully open and unobstructed to effectively address low airflow. Begin by inspecting each register, confirming no furniture or drapery impedes airflow. Blocked registers can greatly reduce performance. Next, check the air filter. A clogged filter restricts airflow, causing the system to strain. Replace it if it’s dirty, using the manufacturer’s recommended type and size for best effectiveness.
Proceed to inspect the blower motor. A malfunctioning motor can hinder airflow. Listen for unusual noises or vibrations, and make sure the motor is securely mounted. If issues persist, consult a technician to examine the motor’s wiring and connections.
Evaluate the ductwork for any visible leaks or obstructions. Use a flashlight to identify gaps, disconnections, or debris within ducts. Sealing these gaps with mastic sealant or aluminum foil tape enhances airflow distribution.
Preventing Short Cycling
After guaranteeing ideal airflow, focus on preventing short cycling by examining the thermostat settings and placement. First, check if the thermostat is set to the correct mode and temperature. Incorrect settings can cause the heat pump to turn on and off frequently. Confirm the thermostat is not exposed to direct sunlight, drafts, or heat sources, as these can skew its readings, causing short cycling. Relocate it to an interior wall, away from such influences.
Next, inspect the heat pump’s control board for error codes that might indicate sensor issues. Faulty sensors can misinterpret temperature readings, leading to short cycling. If necessary, replace defective sensors promptly.
Verify the refrigerant levels; low refrigerant can trigger the heat pump to cycle erratically. If you suspect refrigerant issues, enlist a certified HVAC technician to check and recharge the system.
Additionally, confirm that the heat pump is not oversized for your home. An oversized unit will reach the desired temperature too quickly, causing frequent cycling. If oversizing is suspected, consult a professional for a load calculation.
Tackling Frozen Coils
To tackle frozen coils effectively, confirm the airflow is unobstructed by checking for clogged filters or blocked vents. Clean or replace filters as needed and verify all vents are open and free of obstructions. Inspect the evaporator coils for ice buildup, which can impede heat exchange and compromise system efficiency.
Next, examine the refrigerant levels. Low refrigerant can cause the coils to freeze. If you suspect low levels, contact a certified HVAC technician to safely check and recharge the system. Having the correct refrigerant charge is essential to maintaining peak performance.
Verify the thermostat settings. Ensure the thermostat is set to the appropriate mode and temperature. Incorrect settings might cause the system to overwork, contributing to coil freezing. Adjust as necessary to prevent excessive strain on the heat pump.
Finally, check the defrost cycle operation. The defrost cycle should activate to remove any ice accumulation on the coils. If it’s malfunctioning, ice will continue to build up. Consult the heat pump’s manual or a professional to troubleshoot and repair defrost cycle issues.
Addressing these areas will help maintain an efficient heat pump, confirming comfort and reliability for those you serve.
Resolving Electrical Issues
Identifying electrical issues in your heat pump starts by inspecting the circuit breaker and verifying that all connections are secure and free of corrosion. Begin by switching off the power to your heat pump at the main panel. Confirm that the circuit breaker hasn’t tripped. If it has, reset it and observe if it trips again—a sign of a deeper issue possibly requiring professional attention.
Next, examine the thermostat settings. Verify it’s set to the correct mode and temperature. Malfunctioning thermostats often cause heat pump issues. Replace batteries if needed and recalibrate the thermostat to verify accurate readings.
Check the wiring connections inside the heat pump. Loose or corroded wires can interrupt electrical flow, leading to operational failures. Use a multimeter to test for continuity and voltage, verifying readings align with the manufacturer’s specifications. Replace any damaged wiring promptly to prevent short circuits.
Inspect the capacitor, verifying it’s not bulging or leaking. A faulty capacitor can impede the motor’s function. Discharge the capacitor safely before testing it with a multimeter. If it’s defective, replace it to restore functionality. Always prioritize safety and, when in doubt, consult an HVAC professional to tackle complex electrical issues efficiently and safely.
Improving Energy Efficiency
Consider upgrading to a programmable thermostat to enhance your heat pump’s energy efficiency and reduce operational costs. Programmable thermostats allow you to set specific temperatures for different times of the day, minimizing waste. By programming your thermostat, you ensure your heat pump isn’t working harder than necessary, especially during peak energy demand times.
To further improve energy efficiency, follow these steps:
- Seal Ductwork: Inspect your ductwork for leaks or damage. Use mastic sealant or metal tape to seal any gaps, ensuring air circulates efficiently throughout your home.
- Clean or Replace Filters: Check your heat pump’s air filters monthly. Dirty filters restrict airflow, causing your system to work harder. Replace or clean filters regularly to maintain ideal airflow and efficiency.
- Inspect Vents and Registers: Ensure all vents and registers are open and unobstructed. Blocked vents force your system to consume more energy to maintain desired temperatures, reducing efficiency.
Implementing these strategies will greatly improve your heat pump’s performance, lowering energy bills and supporting a more sustainable living environment. By taking these steps, you’re enhancing system efficiency and contributing to environmental stewardship, ultimately serving others by promoting energy-conscious living.
Maintaining Optimal Performance
Verify your heat pump operates at peak performance by scheduling regular professional maintenance addressing issues like refrigerant levels, electrical connections, and component wear. During each inspection, confirm that the technician checks for refrigerant leaks and verifies that the system is charged correctly. An undercharged system can lead to inefficiencies and increased energy consumption. Examine electrical connections for tightness and integrity. Loose or corroded connections can lead to system failures or safety hazards.
Monitor thermostat calibration to confirm accurate temperature readings. A miscalibrated thermostat causes erratic system operation, leading to discomfort and higher utility bills. Inspect the defrost cycle operation by observing the outdoor coil for frost buildup. Excessive frost may indicate a malfunctioning defrost control, affecting heating efficiency.
Pay attention to airflow obstructions. Check and clean the air filters monthly. Dirty filters reduce airflow, placing strain on the system and decreasing performance. Evaluate the ductwork for leaks or blockages that impede airflow and compromise system efficiency.
Regular Maintenance Tips
Inspect your heat pump’s air filters monthly and replace them when clogged to guarantee ideal airflow and system efficiency. Clogged filters can cause your system to overheat, reducing its lifespan and performance. By keeping a regular check, you’re making certain that your heat pump effectively serves others by maintaining a comfortable environment.
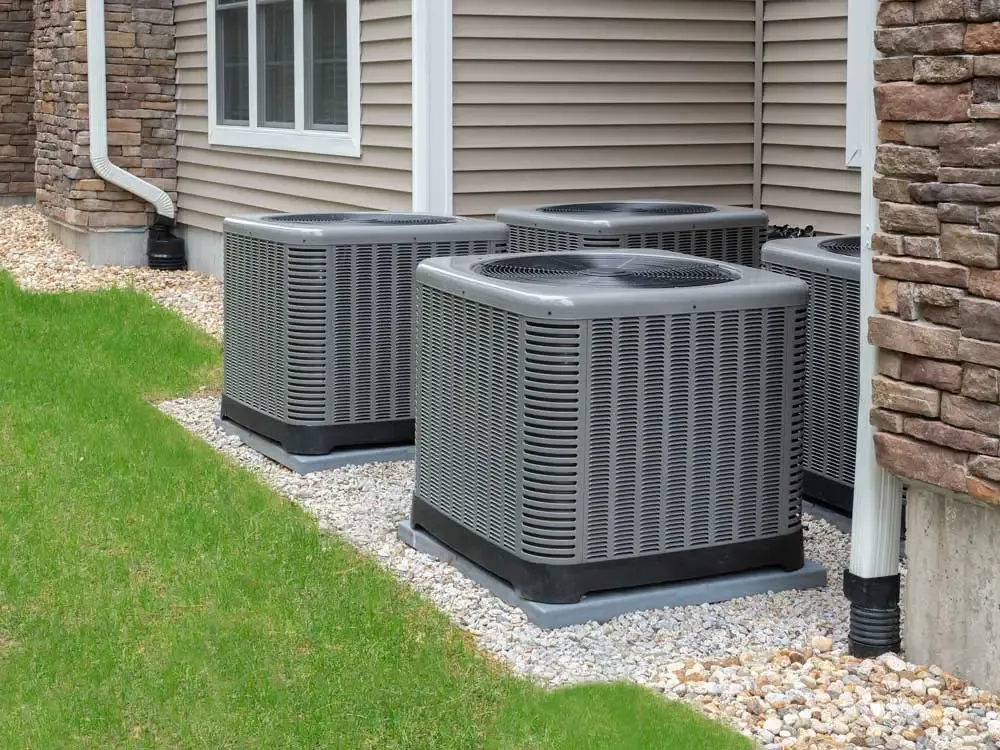
Next, examine the outdoor unit. Clear any debris, such as leaves, grass, or snow that might obstruct airflow. Confirming the unit’s surroundings are clean prevents overheating and enhances efficiency. When you maintain a clutter-free zone around your heat pump, you’re optimizing its function and extending its service to others.
Consider these crucial steps for thorough maintenance:
- Inspect Electrical Connections: Tighten loose connections and examine the wiring for any signs of wear. Faulty connections can lead to inefficient operation or system failure.
- Check Thermostat Settings: Ensure the thermostat is calibrated correctly to prevent erratic heating or cooling cycles, which can cause discomfort.
- Monitor Refrigerant Levels: Low refrigerant can lead to inefficient heating or cooling. If you suspect a leak, consult a professional for precise diagnosis and repair.
Conclusion
By staying proactive with your heat pump maintenance, you’ll keep it running like a well-oiled typewriter. Regularly check for thermostat accuracy, replace air filters, and guarantee airflow isn’t obstructed. Don’t ignore strange noises or uneven temperatures—diagnose these early. Call the cavalry of professionals if you encounter frozen coils or electrical issues. With these troubleshooting tips, you’ll ensure your heat pump operates efficiently and enjoys a long lifespan, keeping your home comfortable through all seasons.
Frequently Asked Questions
How Do I Choose the Right Size Heat Pump for My Home?
First, calculate your home’s square footage. Use a Manual J load calculation to determine heating and cooling needs. Consider insulation, window types, and climate. Consult a professional for precise sizing to ensure efficiency and comfort for occupants.
What Are the Environmental Benefits of Using a Heat Pump?
You’ll cut carbon emissions by using a heat pump, as they efficiently transfer rather than generate heat. They reduce reliance on fossil fuels, lower your home’s carbon footprint, and align with eco-friendly goals, benefiting future generations.
Can Heat Pumps Be Used in Extremely Cold Climates?
Yes, you can use heat pumps in extremely cold climates. Choose a cold-climate heat pump model, guarantee proper insulation, and regularly maintain it. Install supplemental heating for extreme cold spells to guarantee efficient performance and reliability.
How Long Does a Typical Heat Pump Last Before Needing Replacement?
When push comes to shove, your heat pump typically lasts 10 to 15 years. Keep your system humming by scheduling regular maintenance, checking refrigerant levels, and cleaning filters. Remember, timely troubleshooting guarantees efficiency and extends lifespan.
Are There Government Incentives for Installing Heat Pumps?
You should investigate federal and state renewable energy incentives. For detailed programs, check the Database of State Incentives for Renewables and Efficiency (DSIRE). This will help you serve clients efficiently and promote sustainable energy solutions.